My private Blog is back! Thx to Claude.
My private blog is back. Thanks to Claude.
I had not written a private post for years. Blogging is tedious: copying images off the phone, resizing them, writing the text, ordering everything, labelling pictures. After a three-day hike through the Villnöß valley in the Dolomites with the family I thought: agents can do the boring part. And while they are at it, I want something I never had before, a 3D view of the hike, the kind of thing Strava shows you, but running inside my own WordPress.
On LinkedIn I summarised it in six steps. Here is the long version, with the prompts I actually typed (copied from my Claude Code history), what worked, and where Claude made a mess.
 Now I can portrait my whole family as a comic. Privacy for my children, some nice insights for my blog.
The setup
Claude Code in a terminal, one folder per project, and the Chrome extension so Claude can see what it built. My blog already had a small home-made plugin and a Python publishing tool from an earlier session where I let Claude write concert reports. Claude had stored there how to deploy over FTP, how to talk to the WordPress REST API and how to roll back.
One decision made everything faster. „Nobody“ reads my private blog regularely, so I declared it a dev system:
ah, my wordpress blog is free to play! Just create a new entry with tag "private". I will login the browser inside my wordpress so you have full play capabilities! No worries, no one reads that blog, you can play via FTP and wordpress API and Chrome debug as much as you wish. think of it as a dev system
Claude saved that as a memory, so later sessions did not ask for permission every time they wanted to deploy to the test post. I would not do this with a blog that has readers.
Step 1: a 3D map from three GPX files
This was the first prompt, on a Friday evening at 21:18, with a screenshot of a 3D alpine view attached:
Hi there. I want to build a kind of leaflet js map for the 3 GPX tracks I have in this repo. The represent a hike. I want a 3d view on the alps in Javascript like the picture attached [Image #1]. Please make a plan on how to build a website that can to this. Find tools to allow landscape tiles to render. I found out https://sandcastle.cesium.com/?id=3d-tiles-feature-styling can do so, but maybe OpenGlobus is better. I did a similar thing with https://www.rayshader.com/ which does not seem to have updated. Ideas, plans? If you think its a quick one, already build an index.html. Feel free. Clean up the gpx file before, because sometimes I was just standing at a point
Why it worked: I named the options I knew (Cesium, OpenGlobus, rayshader) but did not force one, and I allowed it to just build if it was quick. Claude picked neither: it went for MapLibre GL with free Mapterhorn elevation tiles and Esri satellite imagery, no API key needed. The last sentence mattered too. A GPS track of a family hike is full of „standing at the hut for an hour“ jitter, and cleaning that up early turned into the stop detection that later labels the breaks.
The first version looked flat. I had forgotten to give Claude browser access, so it could not see that the terrain never loaded. After a restart with Chrome attached, my feedback was short: „no. check yourself. no terrain. looks flat“. Once it could look at its own output, it fixed it. Then came the product-owner prompt:
ok. Kamerafahrt only would make sense with a point moving kind of. One day should take max 20sec. No one watches more. The day zooms do not work. please remove the whole days. Esri satellite can be fixed. Kamerafahrt should be a simple white backed play button in top left corner that then gets to PAUSE and STOP buttons when activated. height profile is fancy, but please put a little mountain icon to the right under the standard navigators to activate/deactivate it.

Default View needs to be a bit stepper. [Image #5] - Bus does not need to be drawn. thx
(„Kamerafahrt“ is German for camera flight.) Concrete numbers („max 20 sec“), concrete positions („top left“, „under the standard navigators“) and things to delete. That kind of feedback converges in one round.
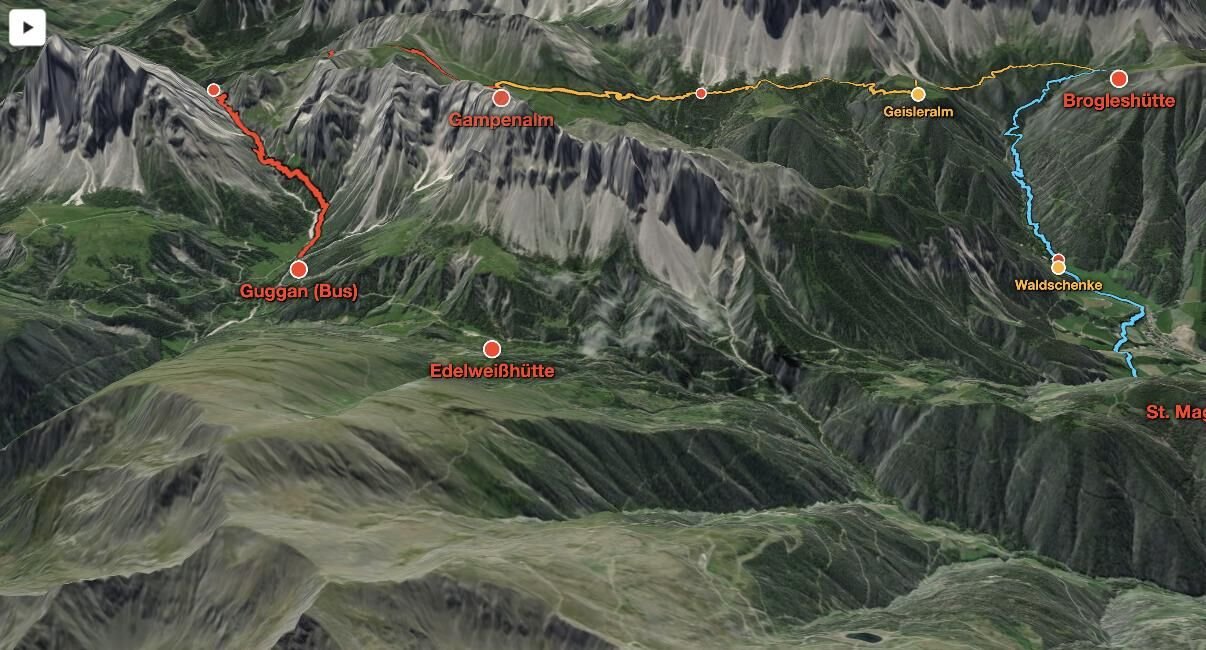 Three days, three colours, huts and named breaks. Default view „a bit steeper“.
Eighteen minutes after the first prompt I asked for the WordPress plugin:
ok. how big is this. can we make this a WordPress Plugin. Please read ~/Documents/git/music_blog to see how to add such a plugin to my blog. Make it "Vacation 3d MAP Vilnoess" as the Plugin name. We can create one for each vacation. It should then allow dragging and dropping a Gutenberg Block with a Dropdown on the vacation to render. Currently only one :D but that is ok
In the same minute I sent „Please take some time to debug the Play button in a subagent. It is currently not doing its job. Continue in the main thread on the plugin“. Running two threads in parallel worked, with a catch: the subagent fixed play, added fast forward, skip and a moving dot, and the page then crashed on play. It took a few rounds to find the reason. Changing zoom and pitch on every animation frame with 3D terrain kills the WebGL renderer. The fix: ease the camera once, then only pan. Another gotcha Claude wrote down: since MapLibre 5, the height values in GeoJSON are absolute, so with exaggerated terrain the track vanished under the mountains. Stripping the heights solved it.
Lesson from the phone: „damn. FullScreen Button is needed for Mobile devices!“ Test maps on a phone before you are proud.
 Camera flight: 20 seconds per day, pause, stop, 2x, next day.
Where Claude made a mess
The next morning I looked at the repository and was not happy. The points of interest lived in PHP, the tracks in JavaScript, the data existed twice, and a backup folder from the FTP deploy had landed in git:
ok. you pushed .remote-backup, remove that from the git tree. You still have "vacations" and "plugin/data" in the repo. I do not want it duplicated. I know the plugin/data comes from vacations. but makes no sense to push both. I also do not understand why you have src and plugins directory both pushed. You made a bit of a mess there!
An agent optimises for „it runs“, not for „I will understand this in a year“. So I also asked for the next vacation to be an interview, not a code change:
I just noticed. the pois live in PHP and not in track.js. that is not clean. we should not store data at two different points. and also for the next Claude session started from CLAUDE.md it is not clear what to do. So normmally it needs to ask the user for 1) GPX 2) POIs 3) Generate breaks - ask for each one if it needs a label 4) Ask if the seperate tracks were analyzed right

That should work, as I will not run this frequently
The result: exactly one committed data file per vacation, raw GPX files git-ignored (they say where my family was, and when), a build_plugin.sh that „compiles“ source plus data into one small plugin per vacation, and a Claude Code skill new-vacation that runs that interview. The plugin is public at github.com/zappingseb/vacation3d.
Step 2: talk for 15 minutes
The text of the hike report is mine. I talked for about fifteen minutes into speech-to-text about the three days and the huts, and let Claude turn that rambling into a proper post. Dictation is the only way I get a private post written at all. Typing a report after a vacation never happens; talking does.
Step 3: a Dropbox to NextGEN Gallery connector
My phone uploads every photo to Dropbox. My blog uses NextGEN Gallery. In between there used to be an afternoon of downloading, resizing and uploading. I created an empty repository with a README describing what I wanted and started Claude with one line:
Read the README.md and built what is mentioned. Please do proper research on ngg, music_blog plugin, dropbox plugin build
Writing the spec as the README is a trick I like: the spec becomes documentation, and Claude has one place to look. Fifty minutes later I had a working WordPress admin page: pick a Dropbox folder and a date range, select photos in a grid (shift-click for ranges), and every picture gets downloaded, shrunk to at most 2048 px and 500 KB and registered in a new gallery with thumbnails. My test was the real thing: „try Camera Uploads directory between Aug 16 and Aug 18“.
Step 4: kids without kids
I want real pictures of the hike on the blog, but not my kids‘ faces. So the photos got white circles over their faces, and Midjourney’s editor got the job of replacing the circles with kids who do not exist. I only have the prompts from the file names, which Midjourney cuts off, so here is what survived:
invent faces on this picture, photorealistic. keep l[…]
It worked surprisingly well: invented faces, same clothes, same mountains, same light. For the cover I went the other way and asked Midjourney to put people into an empty landscape photo:
add 4 people, one woman with blue backpack, one man w[…]
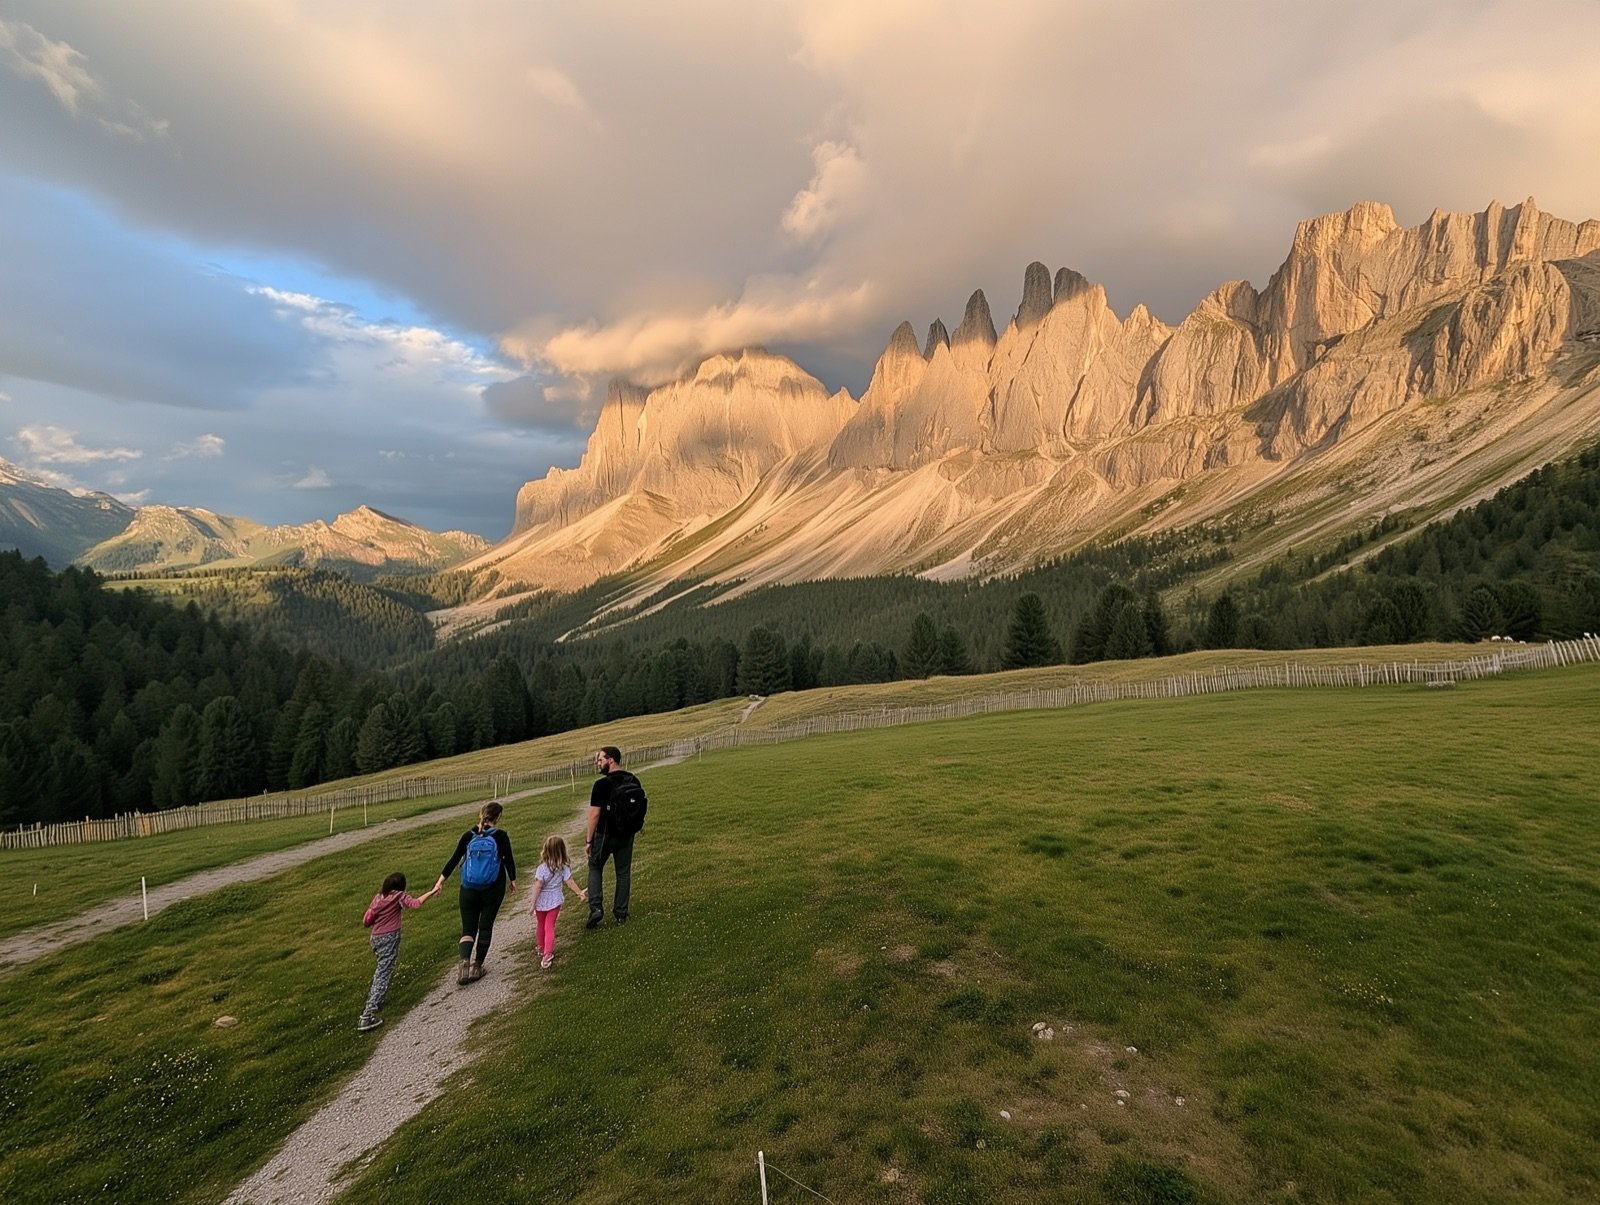 The cover: a landscape photo, four people added by Midjourney.
That image then went through the cover cropper of my blog tool, again by prompt: „Can we now use the cover selector from the music blog to make u6719112965_add_4_people_[…].png in the Downloads folder a cover for“ the hike post. Tools built for one project become building blocks for the next. The comic family at the top is generated as well. No emoji stickers over faces.
Step 5: the part that stays manual
Putting it all together in the WordPress editor, proofreading, sorting pictures. I think that part should stay with me. It is my family’s vacation, and the last read is where the post starts to sound like me.
If you want to try it
- Give the agent eyes. Browser access turned „looks flat“ from my problem into its problem.
- Declare a sandbox. A test post tagged „private“ let Claude deploy and debug without asking.
- Give numbers and positions in feedback: „20 seconds per day“, „top left“, „under the navigators“.
- Review the repository, not only the result. Duplicated data and a committed backup folder came from a session that „worked“.
- Turn the second run into a skill. The next vacation is an interview: GPX, points of interest, breaks, check.
- Bring your domain knowledge. Claude did not know Dropbox search takes
after: and before:; I did.
The 3-day hike report with the 3D map is on engel-wolf.com. The first prompt was at 21:18 on a Friday, the plugin ran on the blog before 22:00, and the photos were in the gallery the next afternoon. The longest part was the hiking.